Preparing and submitting party disclosures using Excel
On this page
A party can choose to enter disclosure information into the online form manually or use the approved NSWEC Excel worksheet option to provide information in bulk. The party agent must still sign and submit the disclosure prepared in accordance with electoral funding legislation.
Starting a party disclosure with an Excel worksheet
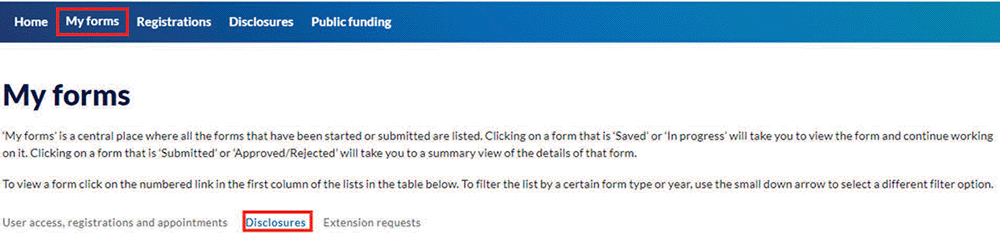
1. Login to Funding and disclosure online.
2. Go to the 'Disclosures' tab.
3. Select the ‘Start or continue a disclosure’ quicklink.
4. The financial year is set at the current financial year. Select the relevant financial year.
5. Select the type of disclosure form you want to create under ‘Disclosure type’.
6. If you’re associated with more than one type of political participant, select ‘Political party’ as political participant type.
7. Select ‘Excel file upload’.
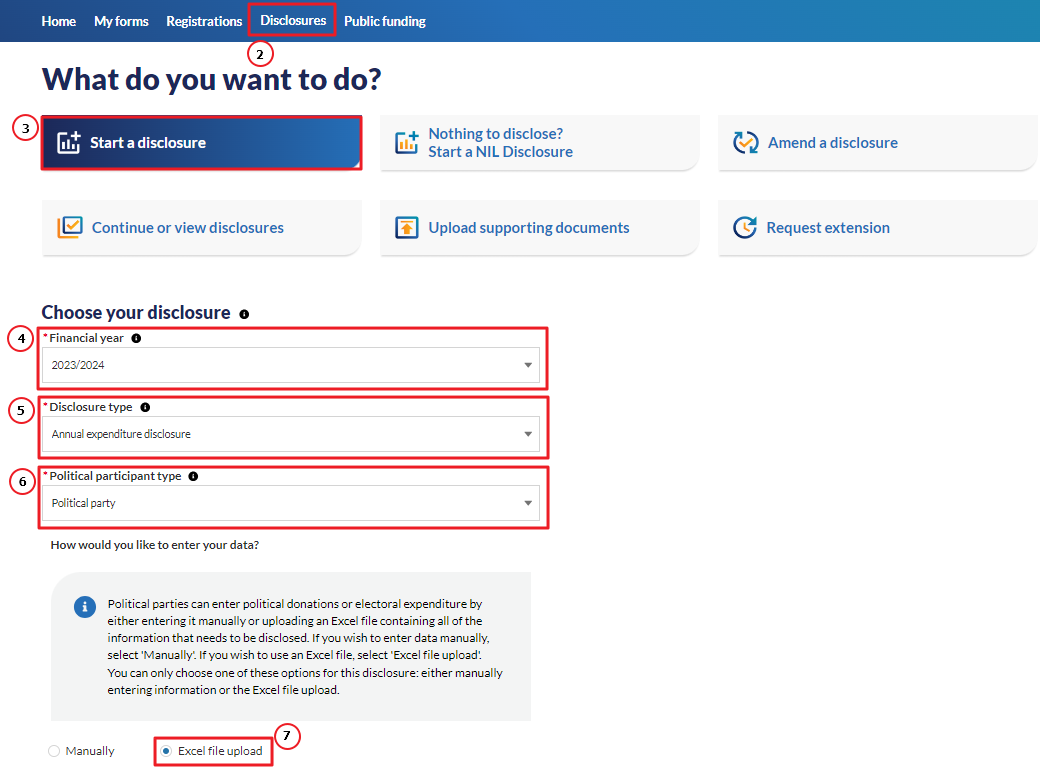
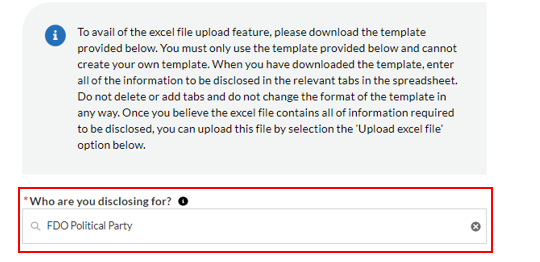
8. If you are responsible for disclosing information for more than one political party, search for that political party using ‘Who are you disclosing for?’. If you are only responsible for one political party, this field will be auto populated for you.
Downloading an Excel worksheet
Parties must only use the NSW Electoral Commission Excel worksheet template as it is formatted to allow for a bulk upload into our system. The template is provided to facilitate the bulk upload of large amounts of information from parties.
9. Select ‘Download excel template’.
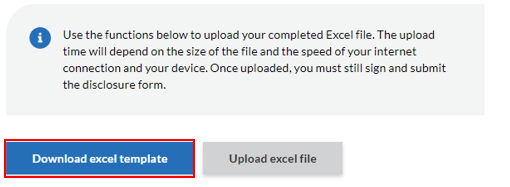
10. Select ‘Yes’ when the pop up window is displayed to continue downloading the Excel worksheet template.
11. Open the downloaded Excel worksheet and start filling in the information. The Excel worksheet can be prepared offline.
12. Save the Excel worksheet in .XLSX format. Only .XLSX file type can be uploaded. Include the party name and disclosure type in the file name.
Note: By completing the above steps you have created a draft ‘in progress’ disclosure with a party worksheet. If you decide you don’t want to lodge the disclosure with the worksheet, you must delete the form and start a new form. To delete a draft form, go to ‘My Forms’, select the draft form and delete it using the 'Delete form' button. You can then create the party disclosure form manually, and enter data manually into the form or data entry screen.
Uploading an Excel worksheet to finalise a party disclosure
When you have prepared the Excel worksheet offline and you are ready to upload and submit it with the disclosure, log in to Funding and Disclosure Online and go to ‘Start or continue a disclosure’. You must follow the steps to return to the upload option. Please follow steps 1 to 8 (above) under ‘Starting a party disclosure with an Excel worksheet’ to return to the screen with the upload Excel option.
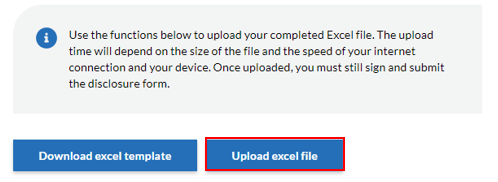
1. Select ‘Upload excel file’.
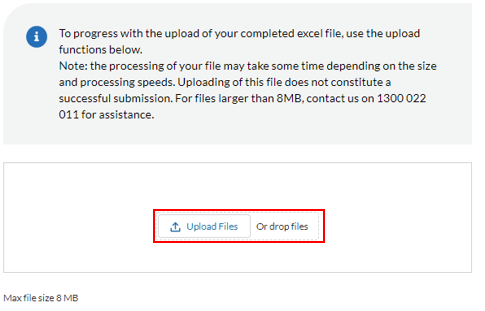
2. Use ‘Upload files or drop files’ to either upload or drag and drop the Excel party worksheet.
3. An uploaded file can be deleted using the rubbish bin icon, if it needs to be replaced or updated.
4. Once the Excel file has been uploaded, select ‘Go to form >’ to upload other supporting documents and/or to sign and submit the disclosure. The Excel party worksheet is now attached to the party’s draft disclosure form.

5. You have the option to select ‘View excel file’ to review the party Excel worksheet uploaded, if required.

Uploading supporting documents
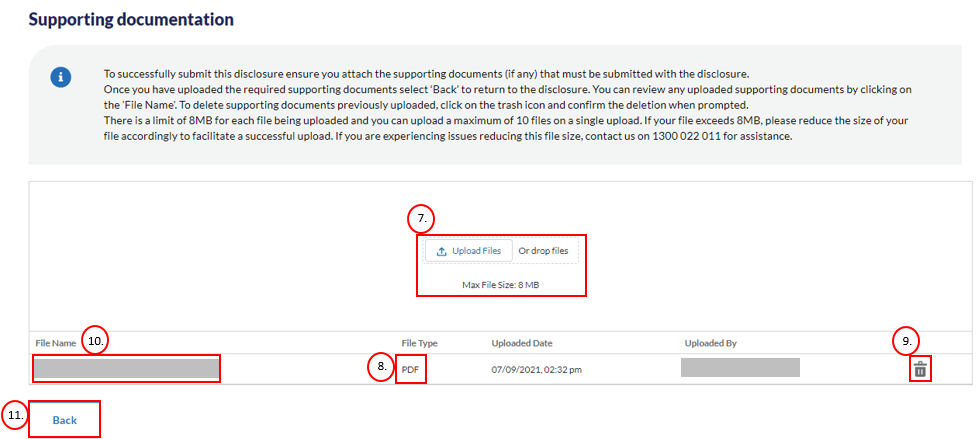
6. Select ‘Upload files’ to upload other supporting documents, if required.

7. Select ‘Upload files or drop files’ to either upload or drag and drop the supporting documentation. A maximum file size of 8MB is permitted. For files greater than 8MB, consider breaking the file into smaller components to support a successful upload.
8. With the exception of ZIP, JPEG and PNG files, all other file types can be uploaded.
9. Uploaded files can be deleted by using the rubbish bin icon.
10. All supporting documentation can be reviewed by selecting ‘File name’.
11. Once all supporting documentation has been uploaded, select ‘Back’ to exit the supporting documentation section.
Note: A maximum of 10 files can be uploaded at any one time, but there is no limit on the total number of files uploaded.
Finalising disclosures – Review, sign and submit
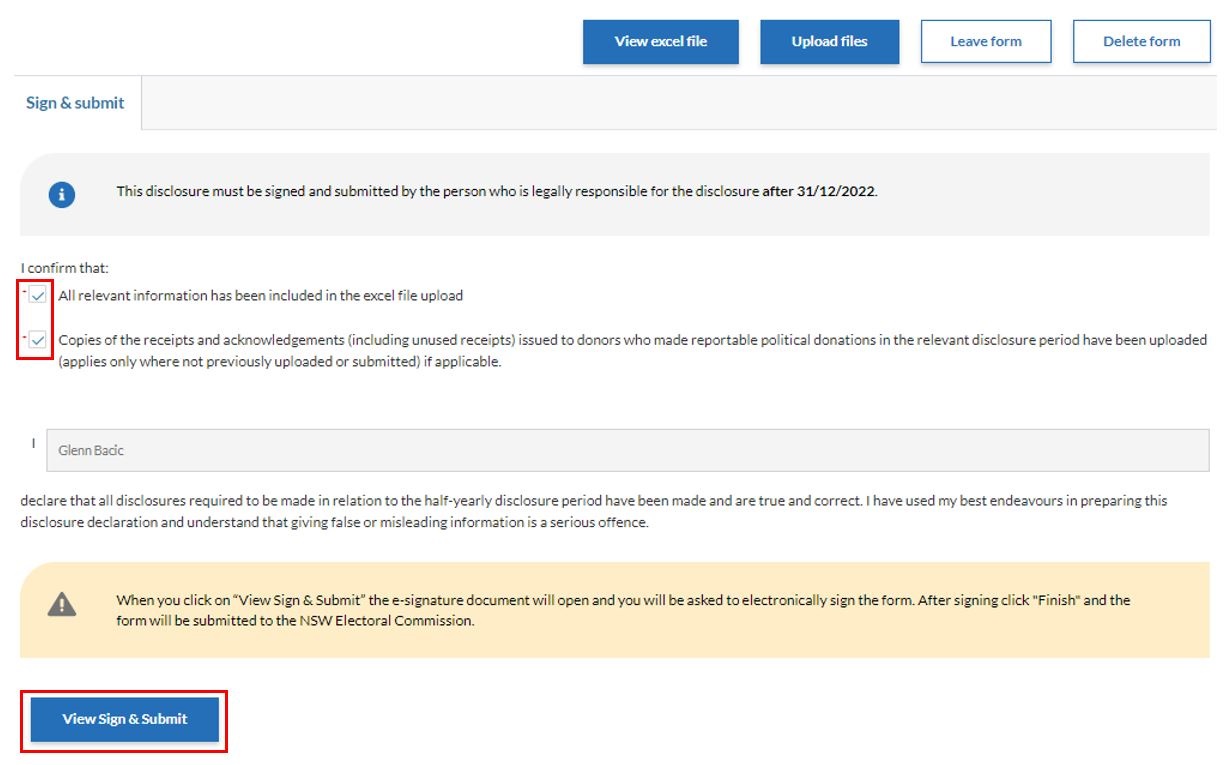
12. If you are the person who is legally responsible for submitting the disclosure form, you will see a ‘Sign & Submit’ tab.
13. You can generate a PDF copy of this disclosure and provide an e-signature by selecting ‘View sign & Submit’, provided all the required confirmations on the screen have been selected and the lodgement period has commenced.
14. You will be redirected to DocuSign to provide an e-signature. This process can take a few minutes depending on your internet speed.
15. The first time you use DocuSign, you will be prompted to agree to its terms of use for the electronic signature functionality.

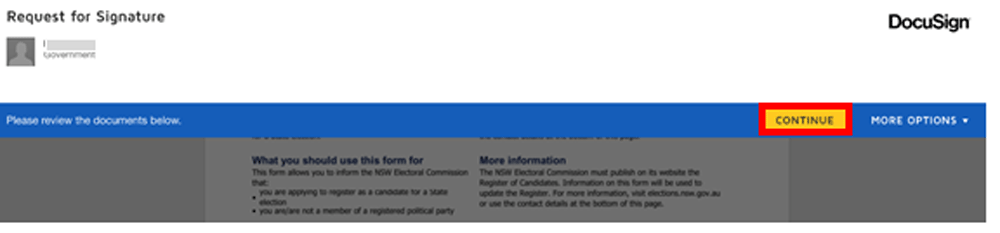
16. Once the PDF has been generated, select ‘Continue’.
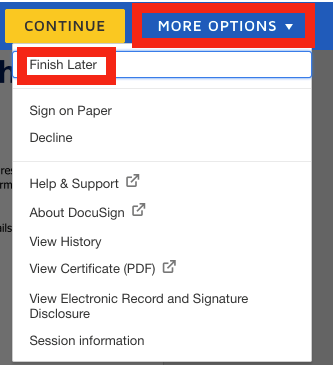
17. Review the PDF form to make sure the information is complete and correct (you will not see the worksheet as part of this PDF, but it is attached to the online form). If you need to change or add information, you can navigate back to the form through ‘More Options’ and selecting ‘Finish Later’.
18. To sign the form electronically, scroll to the declaration section and read the declaration statement. Click ‘Sign’.
19. The date will be autopopulated based on the date the e-signature is provided.
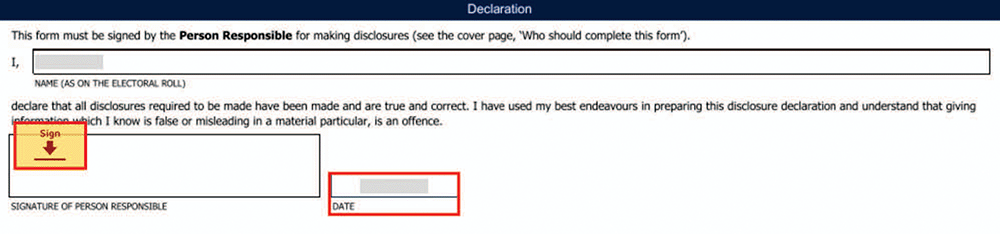
20. Add your electronic signature by selecting ‘+ Add’ and choose to ‘Draw’ or ‘Upload’ your signature. If you have previously provided an electronic signature, this will autopopulate when ‘Sign’ is selected.
21. Select ‘Finish’ to submit your disclosure.

22. Provided the submission is successfully processed, you will be redirected to a screen containing a success message.
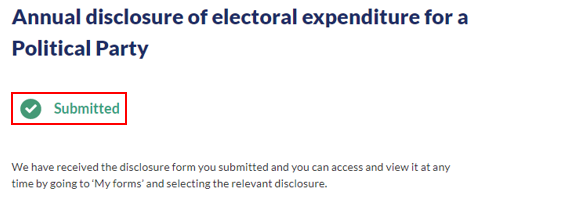
23. Submitted disclosure forms are stored within ‘My forms’ under ‘Disclosures’.